
If the filament is not loaded into the extruder, yet the printer is trying to pull the filament inside, there might be a hardware problem in some of the extruder components: we will examine the causes and fixes in this article.
Ensure that the filament tip is cut at an approximate 45 degrees angle. The printer might struggle to load filament otherwise.
After an attempt at loading filament, the printer will prompt a screen, where it is asked if the filament color is correct. If the filament is not oozing from the nozzle at this stage, push the filament towards the extruder, and after that, select "retry".
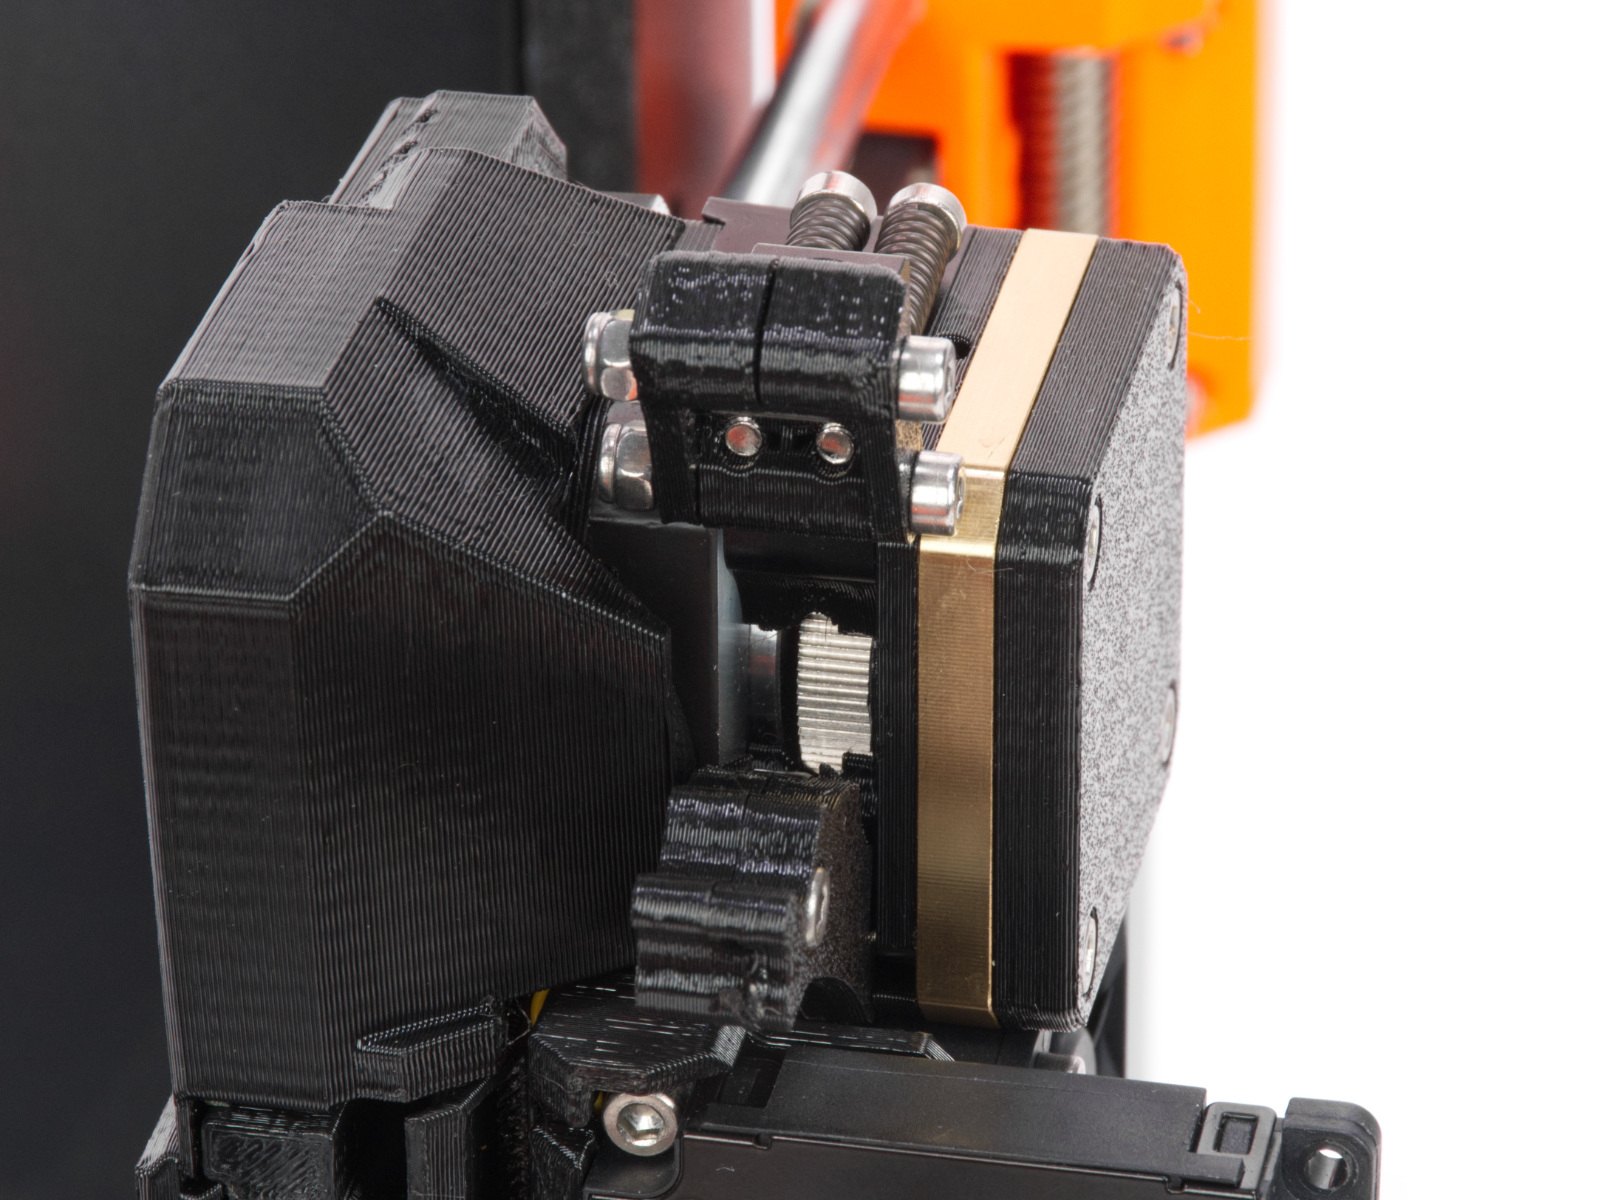
The extruder includes two idler tension screws, to set the correct distance between the drive gear and the two driven gears. These are set to the optimal position at the factory. In case of an intervention on that component, it will be necessary to adjust the idler tension screws to their optimal position: the tips of the screws must be aligned with the front surface of the Idler Nut. After that, close the Idler Block.
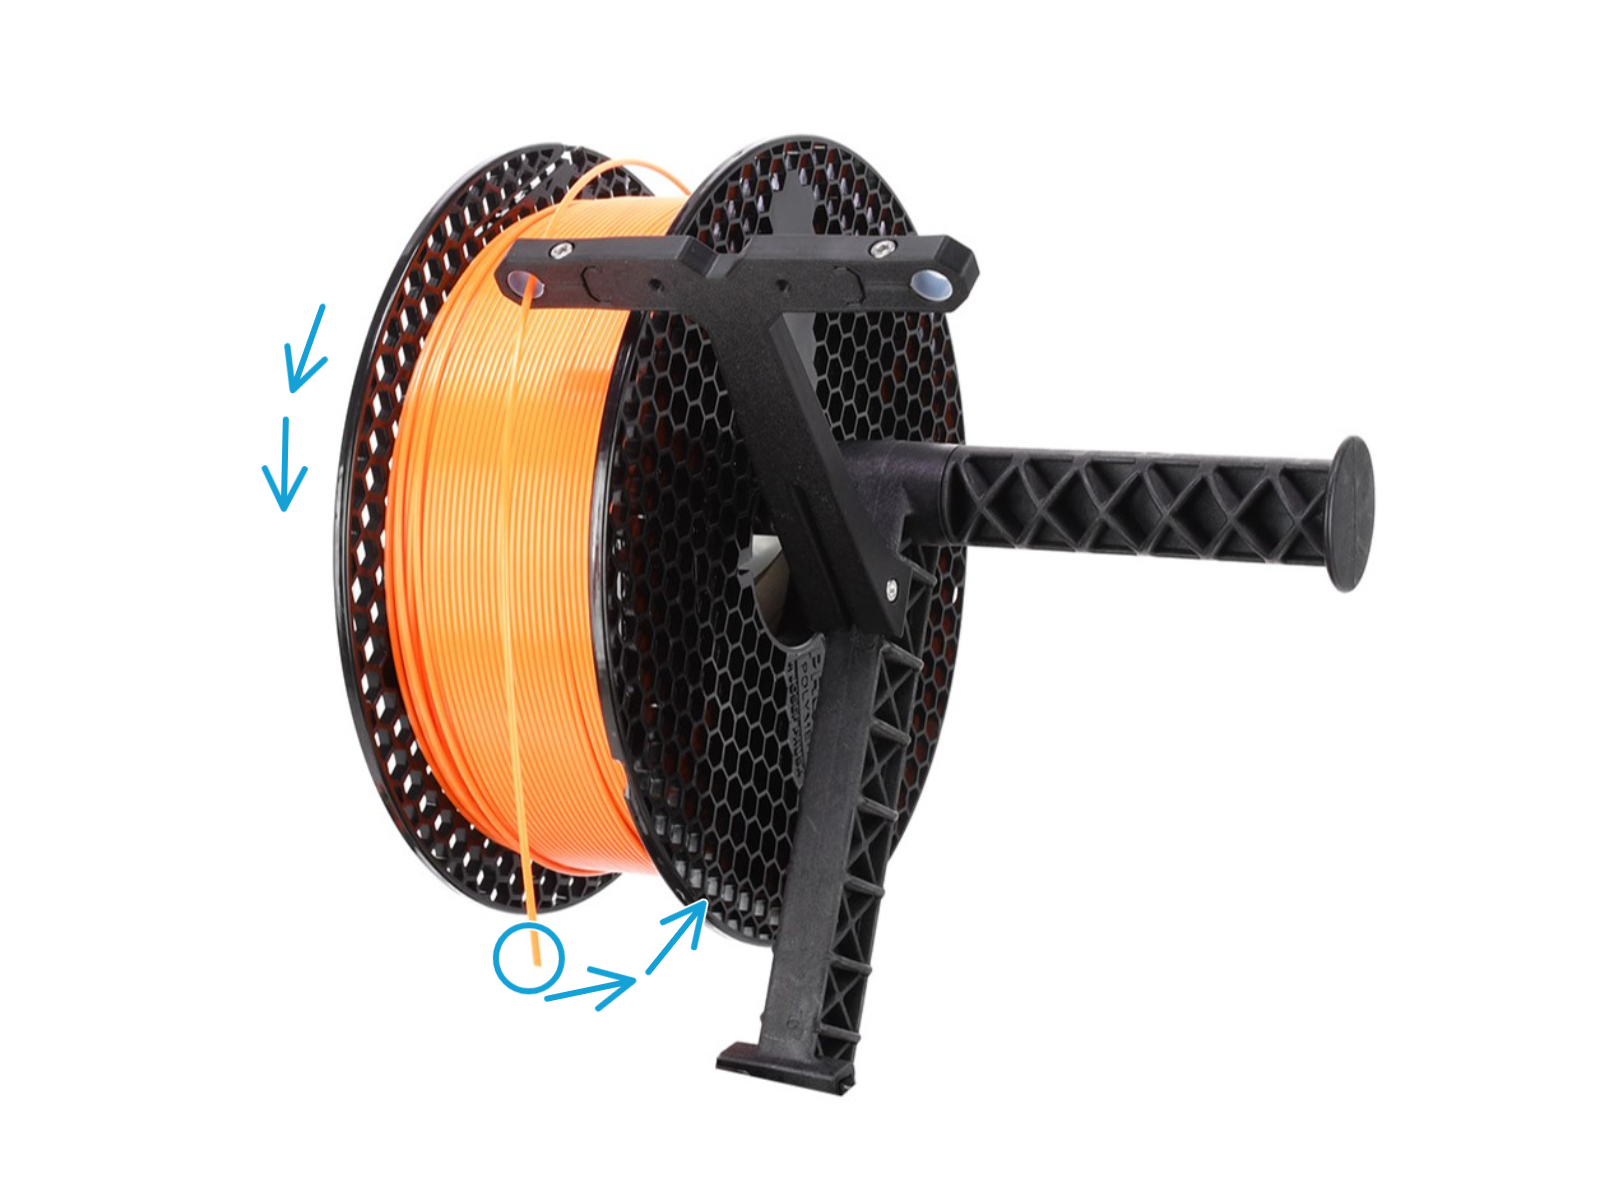
A tangled filament spool can cause a print to fail, as a knot can form on the filament strand. This is caused by letting the filament end go, for example during a filament unloading, causing the filament end to go under another loop. As a visual example, notice the path of the spool parts indicated with green and magenta arrows, inside of the orange rectangle.
Although a tangled filament can cause a print to fail, the chances are minimized by never leaving the printer unattended while it is switched on, a safety measure valid for our printers, as stated in the bundled 3D Printing Handbook of each of our printers.

The filament in a spool is a single, continuous string wound at once from start to finish. It is physically impossible that, during production, a filament coil can get under another.
Perfect winding refers to the filament sitting nice and tidy on the spool, with no overlaps. It is our way of making Prusament visually pleasing.
Even though a spool does not have perfect winding, this doesn't have an influence on it being prone to tangling.
To prevent filament tangling, do not let go of the filament tip whenever the filament is not loaded. Once you are ready to store the spool, put the filament tip on the spaces on the spool, for example on any of the honeycombs for Prusament spools.
Never let go of the filament tip during this procedure, or you'd risk further tangling the filament in different spots.
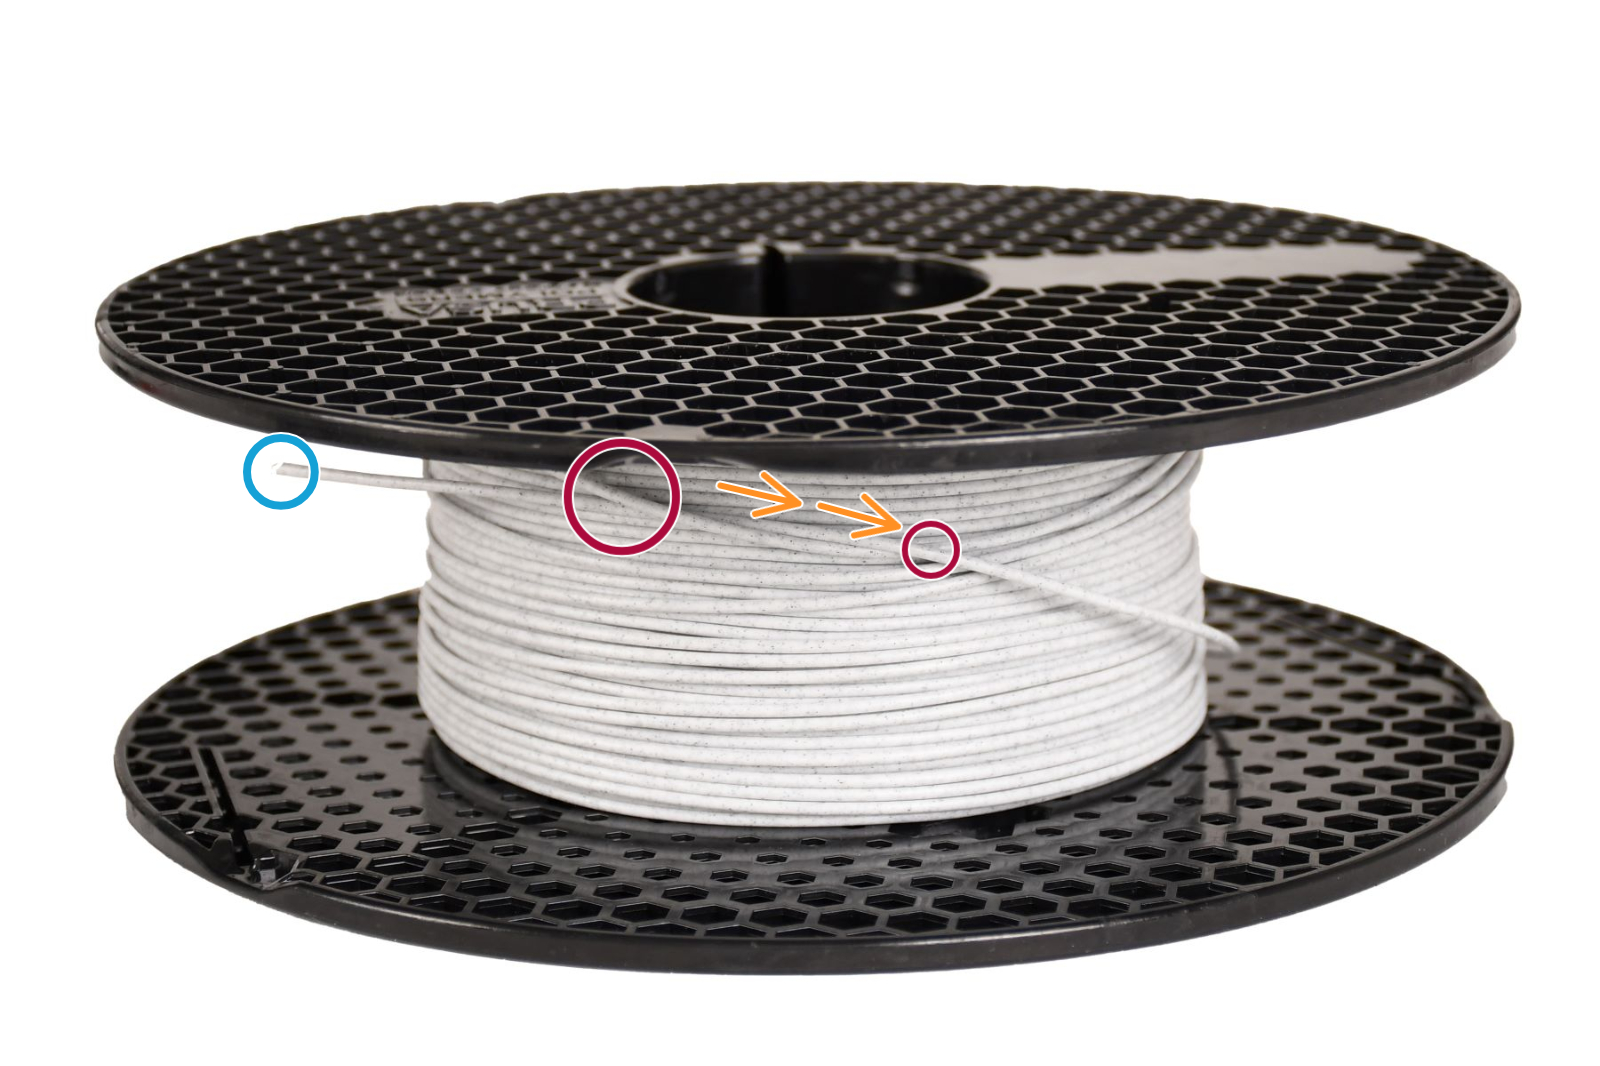
Identify the knotted strands, and gently untangle the knot from that point, without bending the filament. After that, rewind the loose strands by gently rotating both the spool and the coil. Never let go of the filament end, until this is secured on a hole on the side of the spool.
Detangling Video
While you can detangle filament with the filament loaded in the printer, pausing the print and unloading the filament will make the job much easier. While detangling, do not pull on the end of the filament and tighten the roll. Gently unload the filament from the spool until you have gotten to the knot, and then pull the overlapping strands over the lip of the spool, loosening the filament as necessary. Gently rewind the roll once you have cleared the tangle. You can then reload the filament into the printer and resume the print job.
Watch the following video for a more detailed look at how to detangle filament:
A clogged nozzle or hotend is a common issue for FFF/FDM printers. If there are no issues, the filament is pushed in the hotend, melted, and then extruded through the nozzle. However, if the nozzle is damaged or there are impurities in the filament it might get stuck in the hotend, clogging the printer.
Check if there are clicking noises from the extruder
Sometimes the clog is partial, meaning that the printer is able to push some filament through, but it is not enough to print the object properly, leading to visible gaps and missing layers. An early sign of a clogged nozzle is that the filament is not extruded consistently, curls up, and sticks to the nozzle.
The hotend or the nozzle is partially or fully clogged and the internal resistance against the flow of the filament is greater than what the gears are able to push. As a result, the gears are skipping leading to the “clicking” noise and in most scenarios also to the grinding of the filament.
Choosing the right method depends on whether you are able to at least partially load/unload the filament or whether the printer is fully jammed and refusing the move the filament even a little.
Before you start fixing the printer, try unloading the filament and removing it completely. If you are unable to do it, it might indicate a more serious problem, but we will deal with this one as well.
Also, move the extruder upwards from LCD Menu - Settings - Move Axis - Z-axis or by long-pressing the control knob, this way you will get better access to the parts that are clogged.
The 'cold pull' technique allows you to clean your printer’s nozzle and hotend from any material that may be stuck or burnt inside. You can also use it to clean your hotend during your usual maintenance routine. Starting from firmware 6.0.0, the printer will do the process automatically. Note that this automatic process is only available for the MK3.9 and MK4 printers.
The cold pull should be done if your nozzle is only partially clogged, and some filament is still being extruded. If the nozzle is completely clogged, please check the clogged hotend article for MK4/MK3.9, or for XL.
Our testing has found that PLA works best for a cold pull, as other filaments do not retain the tip as PLA does and they will either tear or melt too much. However, there are filaments specifically made for cleaning hotends.
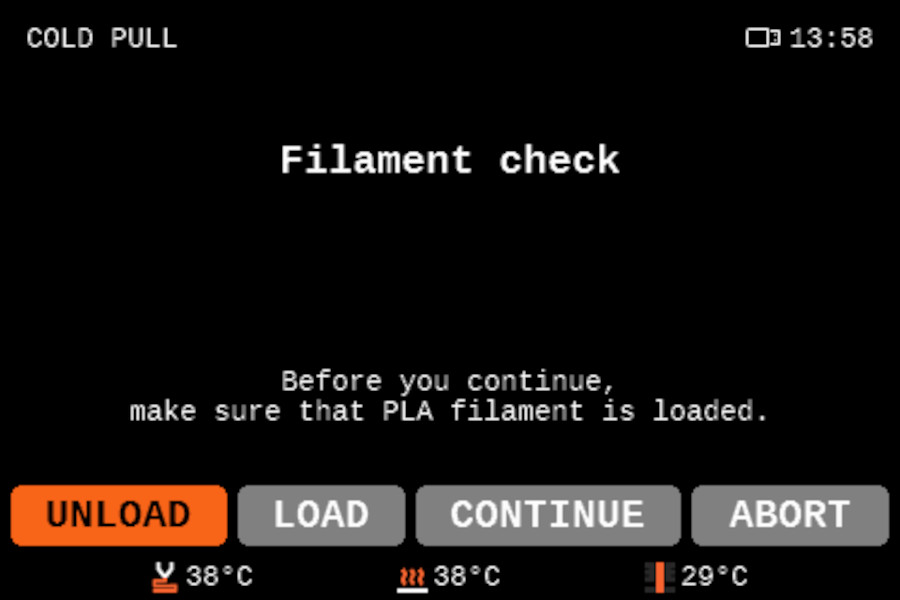
Have at least 30cm of PLA available when making this procedure. From the home screen, navigate to the Control menu, and you will find the Cold Pull option towards the bottom of the Control menu. You will see the options: unload the current filament (recommended in case you have any filament other than PLA loaded), Load PLA filament, and continue with the loaded filament (only use it if the filament loaded is PLA).
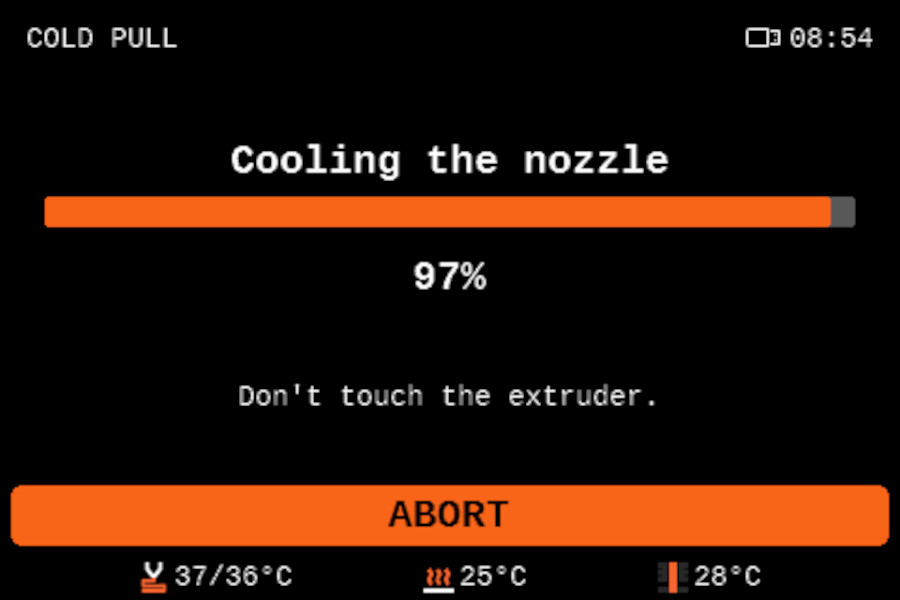
If the nozzle is heated, the printer will wait until it cools to 36 ºC. Then it will heat the printer to 80 ºC. After that, the printer will unload the filament automatically at that temperature, finalizing the cold pull.
 |
 |
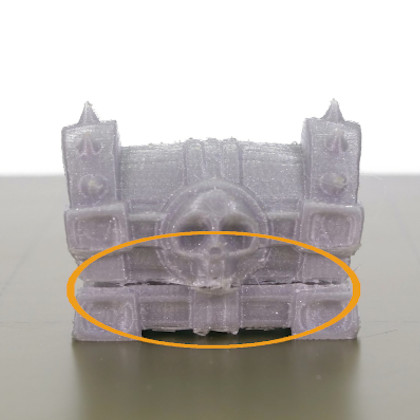
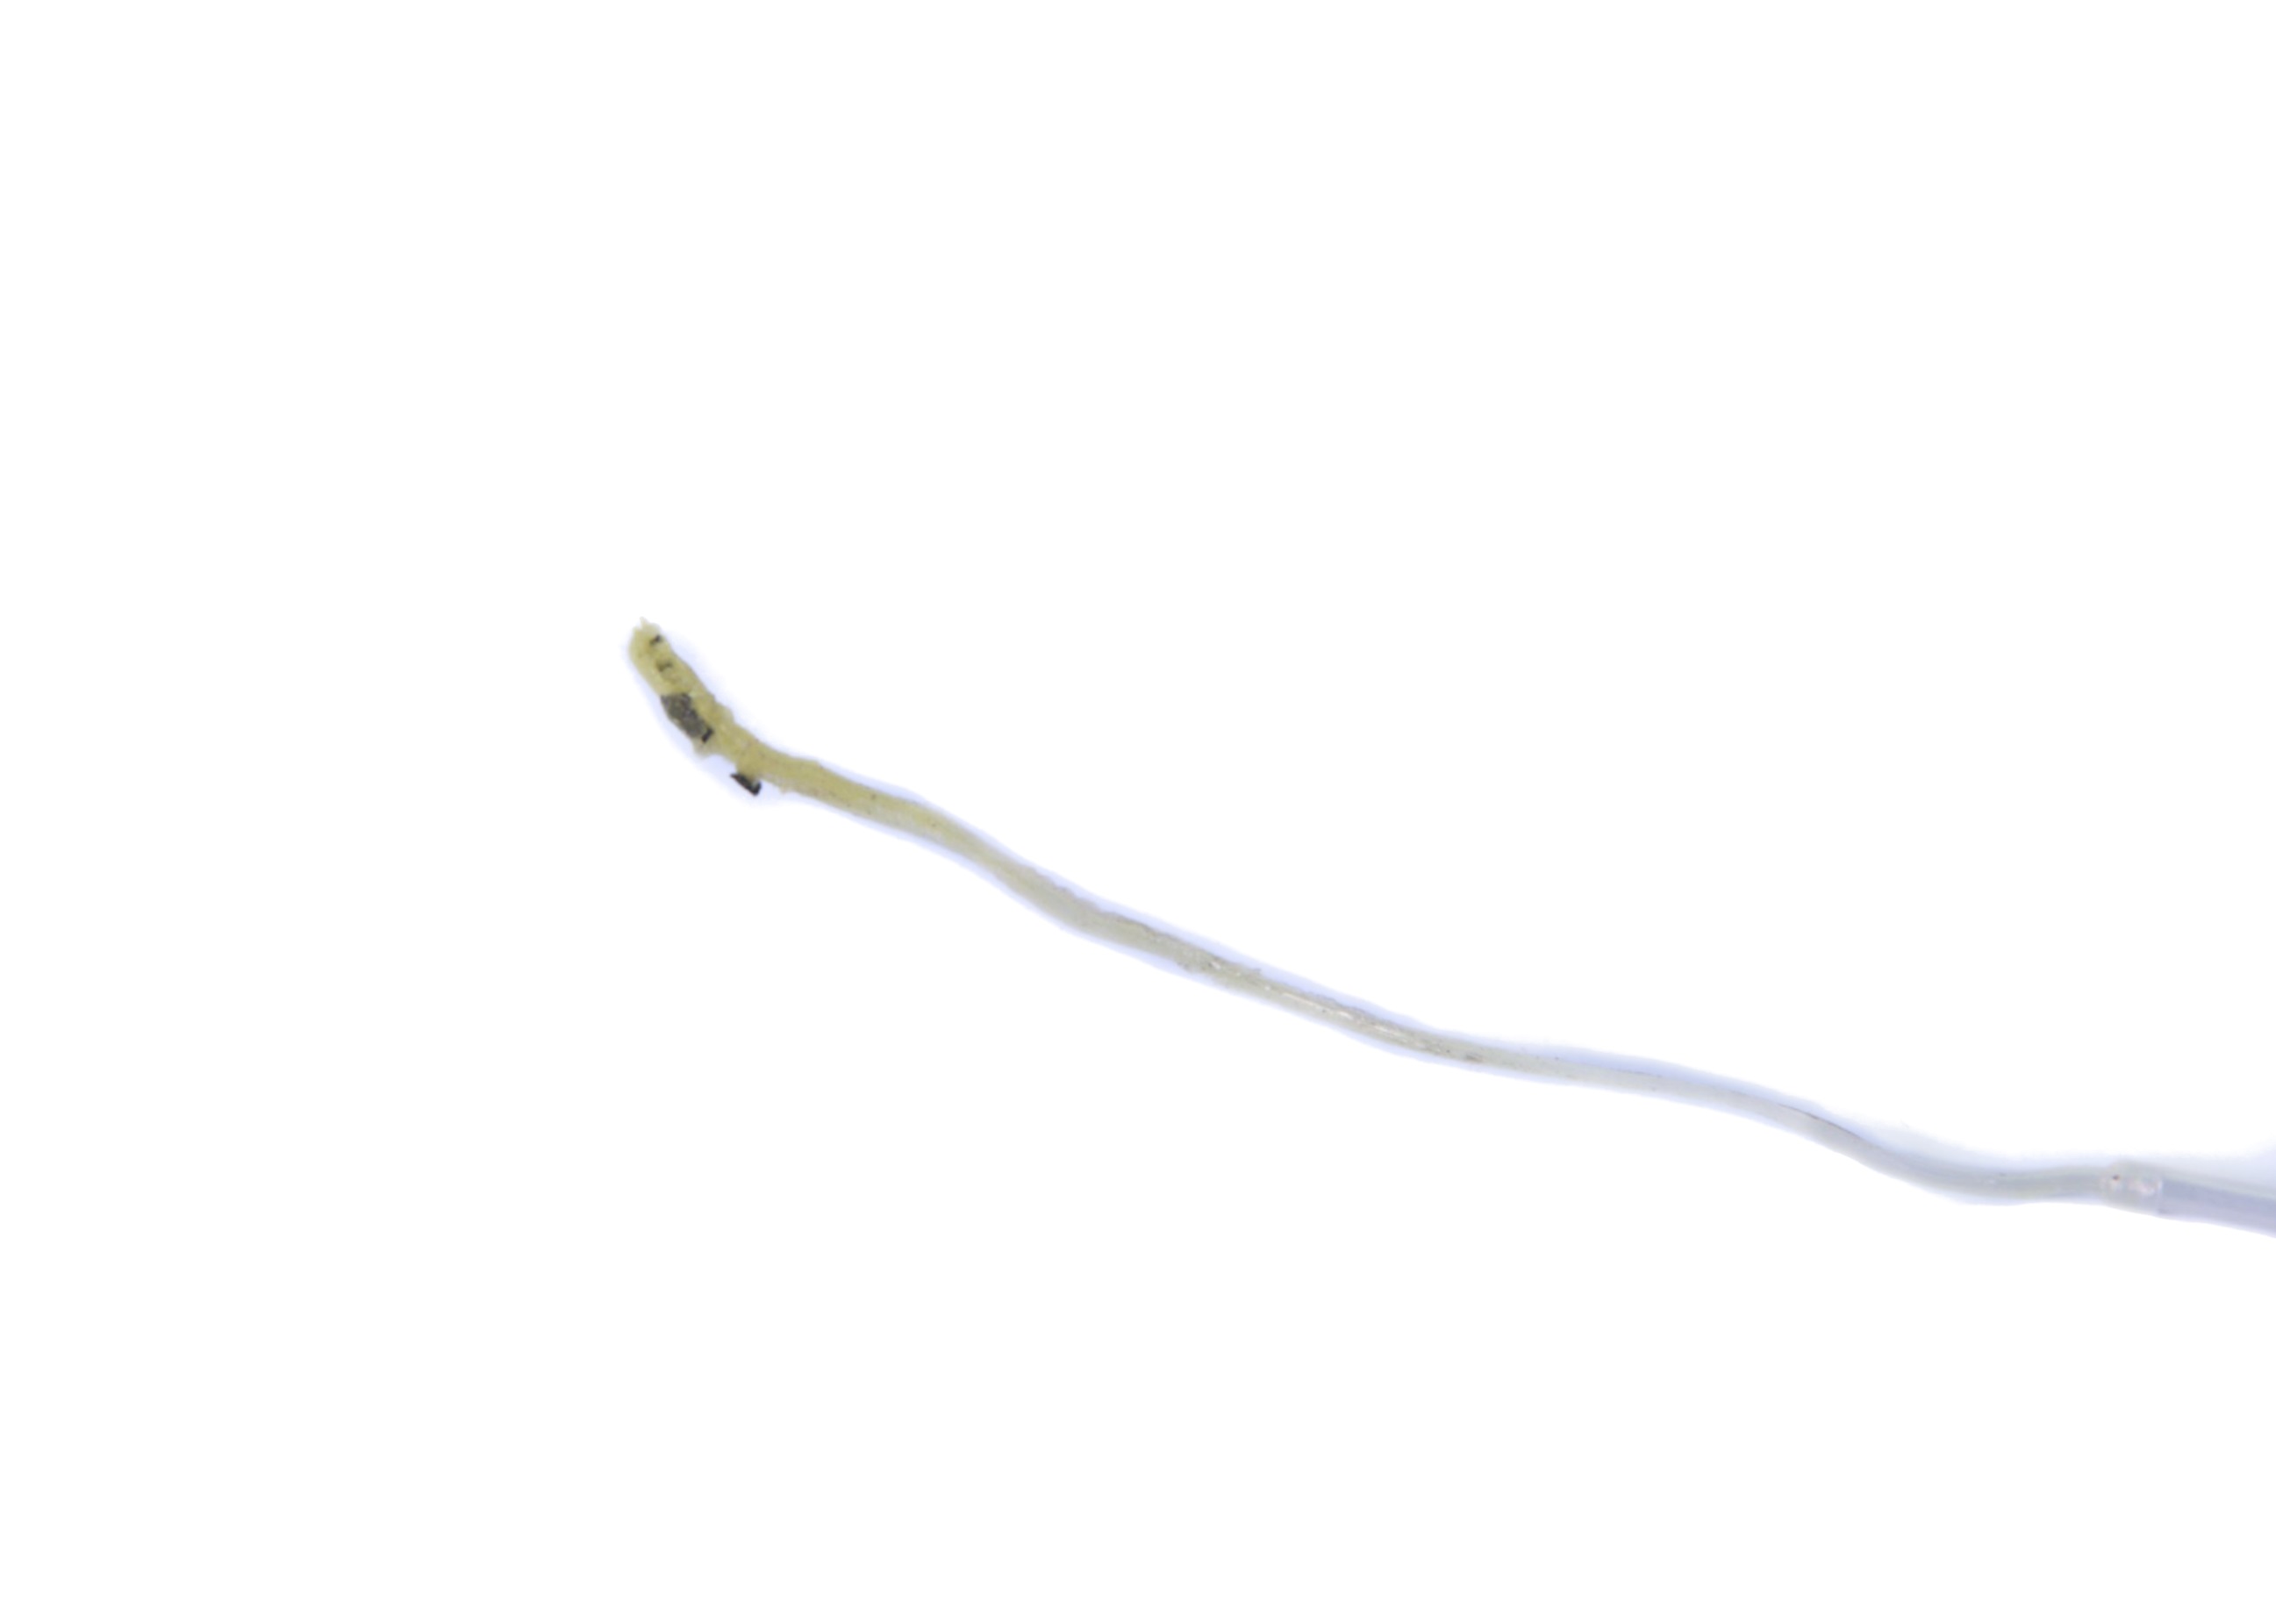
On the tip of the filament that has been pulled out, you may see remnants of the previous material(s) you have been using or some burnt dirt that has settled in the nozzle (left picture). You might want to repeat this procedure several times until the filament comes out clean.
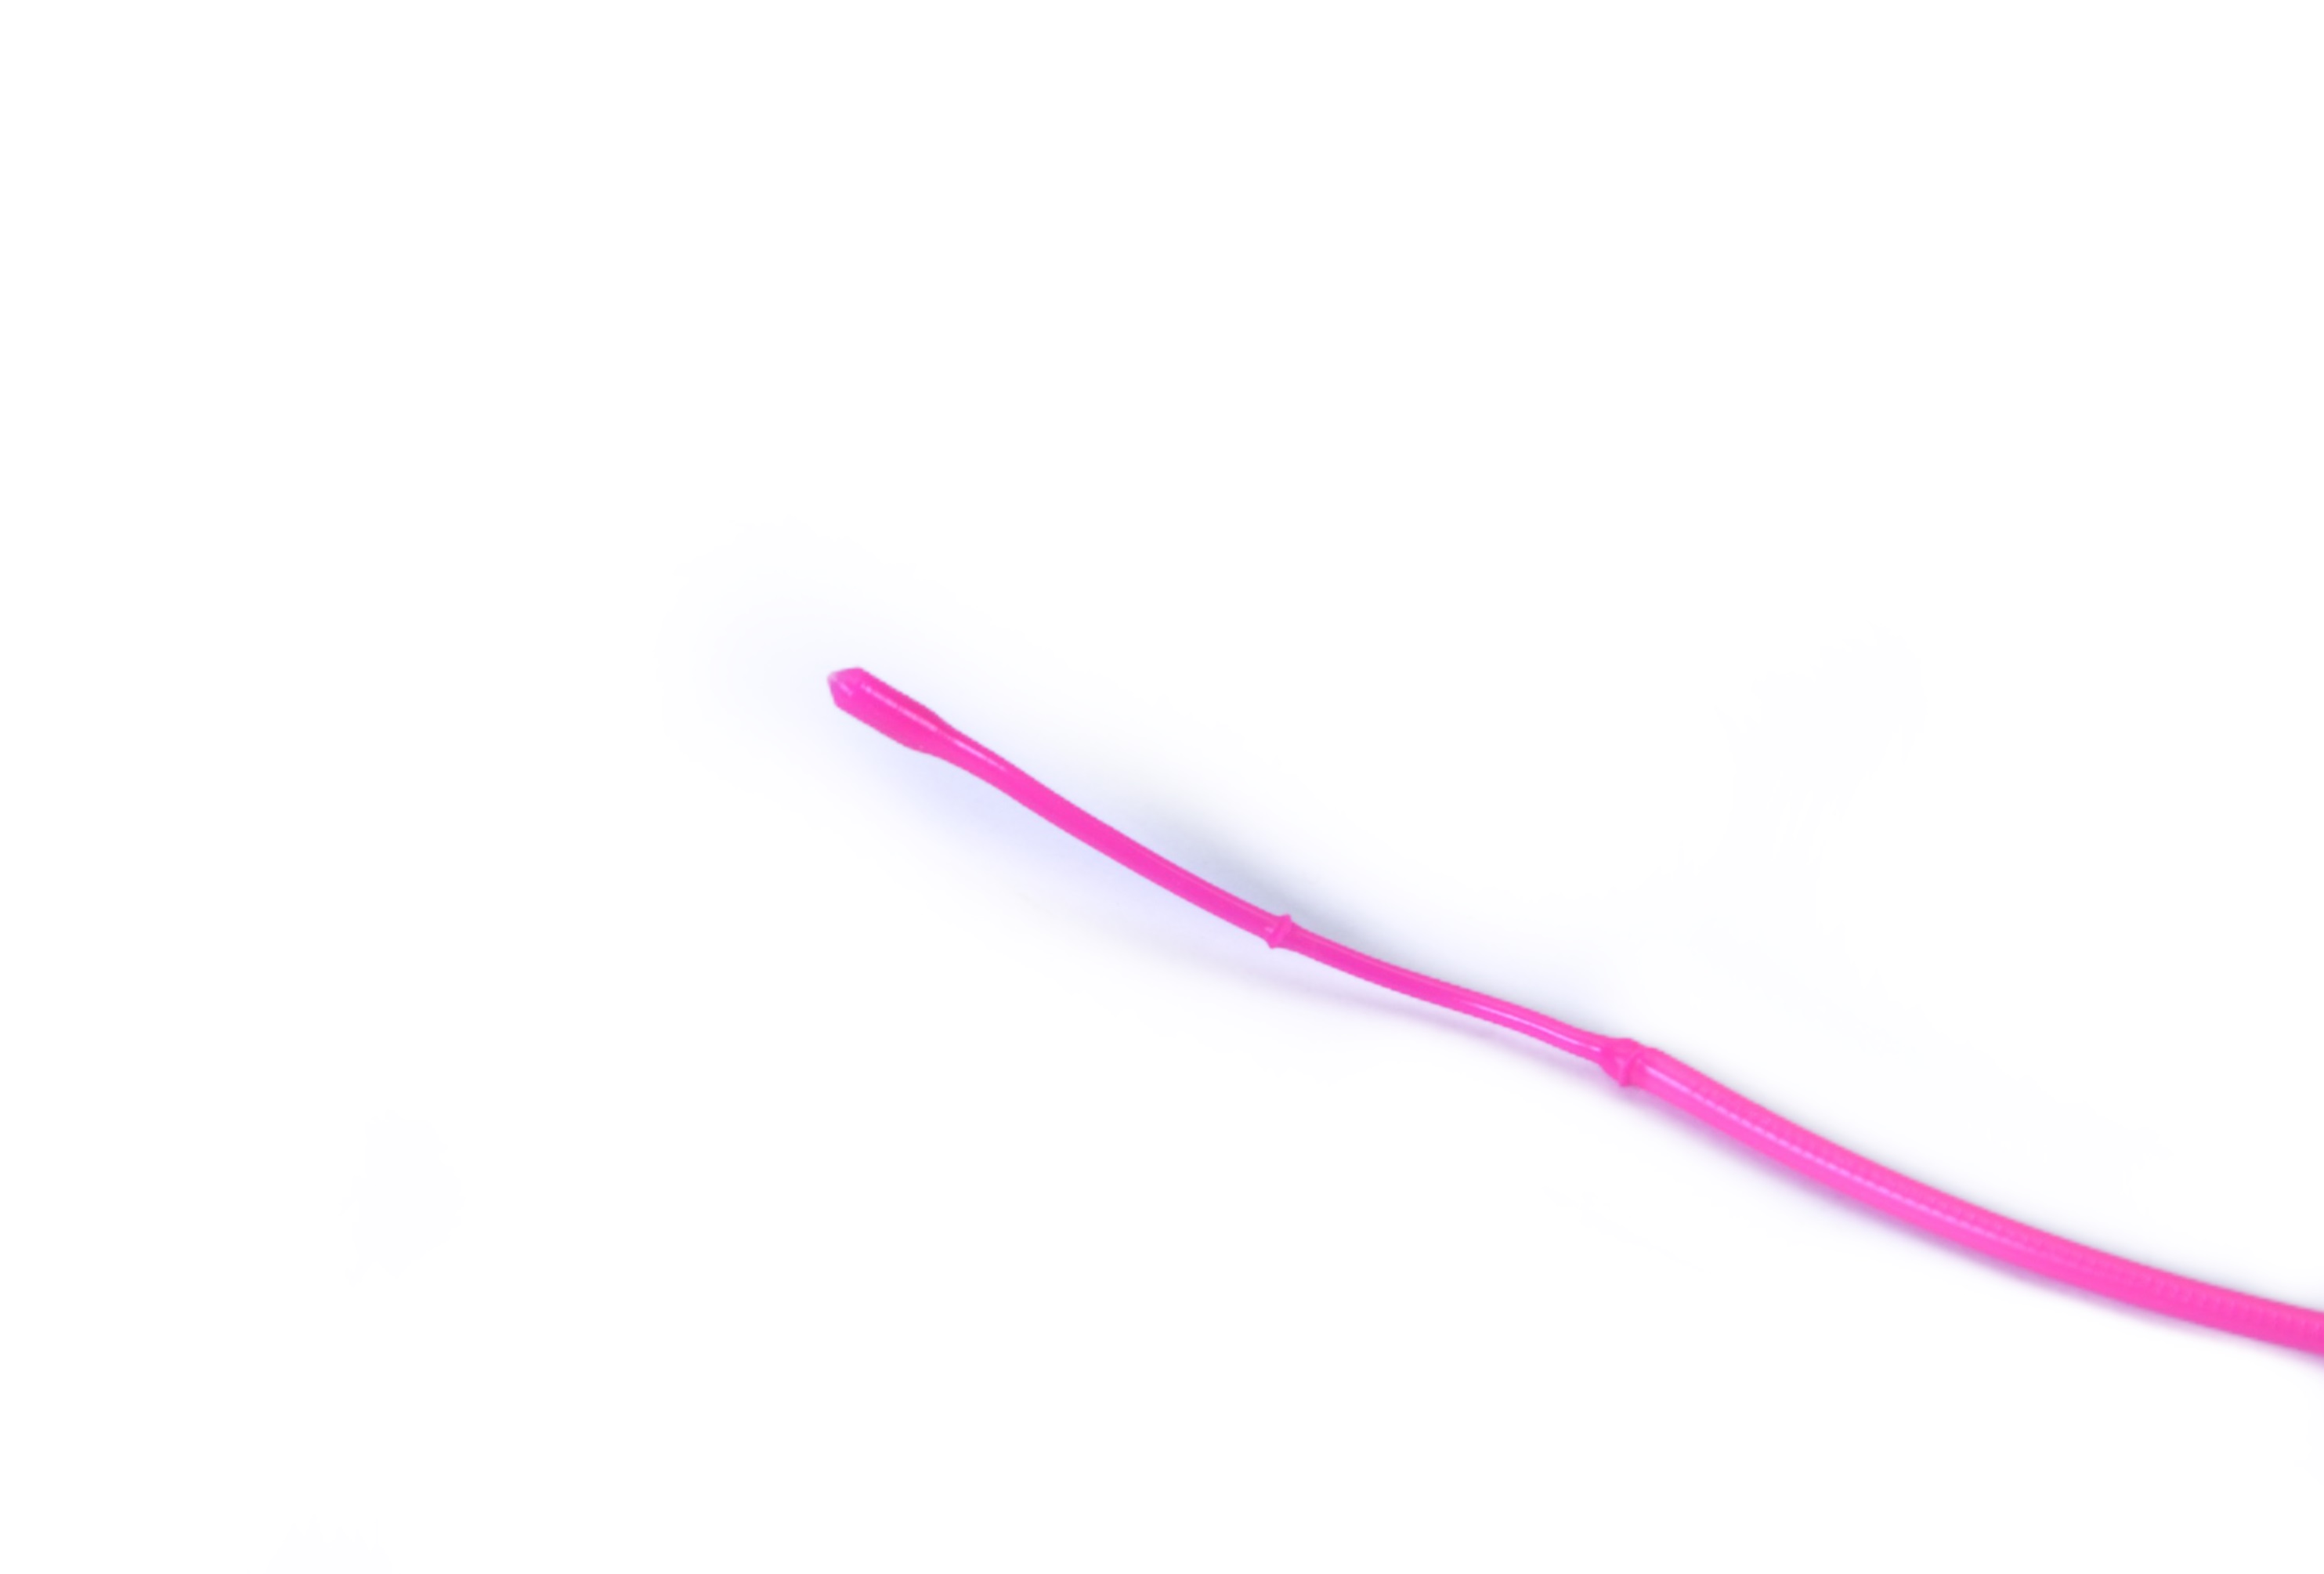
The right picture shows what a clean cold-pulled filament should look like. It is important to have the imprint of the nozzle on it, this way you are sure the nozzle was filled and nothing was left inside. Also, the color is not mixed with the one you have been using previously or has dark marks on it.
 |
 |
The extruder includes two idler tension screws, to set the correct distance between the drive gear and the two driven gears. These are set to the optimal position at the factory. In case of an intervention on that part, you can adjust the idler tension screws to their optimal position: the tips of the screws must be aligned with the front surface of the Idler Nut. After that, close the Idler Block.
Over time, a deposit of filament debris can form in the grooves of the feeding gear, which then causes insufficient filament extrusion. Access the extruder by lifting the Idler Nut, and then moving the Idle Shaft. You can blow away the dirt with compressed air, or use a brass brush or an ordinary toothpick. Use the access hole on the side of the extruder.
Do not touch the hotend while the printer is at a hot temperature. Heated parts can cause severe burns!