From the Prusa Website:
When checking belt tension, make sure to use the Prusa Belt Tuner. This may require the use of a smartphone. Some phone cases can also interfere with the tuner's ability to pick up the frequency from the belt. You may have to remove your phone from its case if the tuner cannot pick up a frequency reliably.
Simply checking the belt tension does not require removing the printer from its enclosure. If you find that the belt tension needs adjusting, click on the next tab titled "Adjusting Belt Tension" for more detailed instructions on how to remove the printer from its enclosure and adjusting the tension from there.
If you find the belt tension insufficient when conducting the axes check, adjust belt tension according to the following procedures:
Removing the Printer from the Enclosure:
Adjusting belt tension can be very difficult with the printer still located inside the enclosure. Removing the printer will make the job much easier.


When adjusting belt tension, make sure to use the Prusa Belt Tuner. This may require the use of a smartphone. Some phone cases can also interfere with the tuner's ability to pick up the frequency from the belt. You may have to remove your phone from its case if the tuner cannot pick up a frequency reliably.
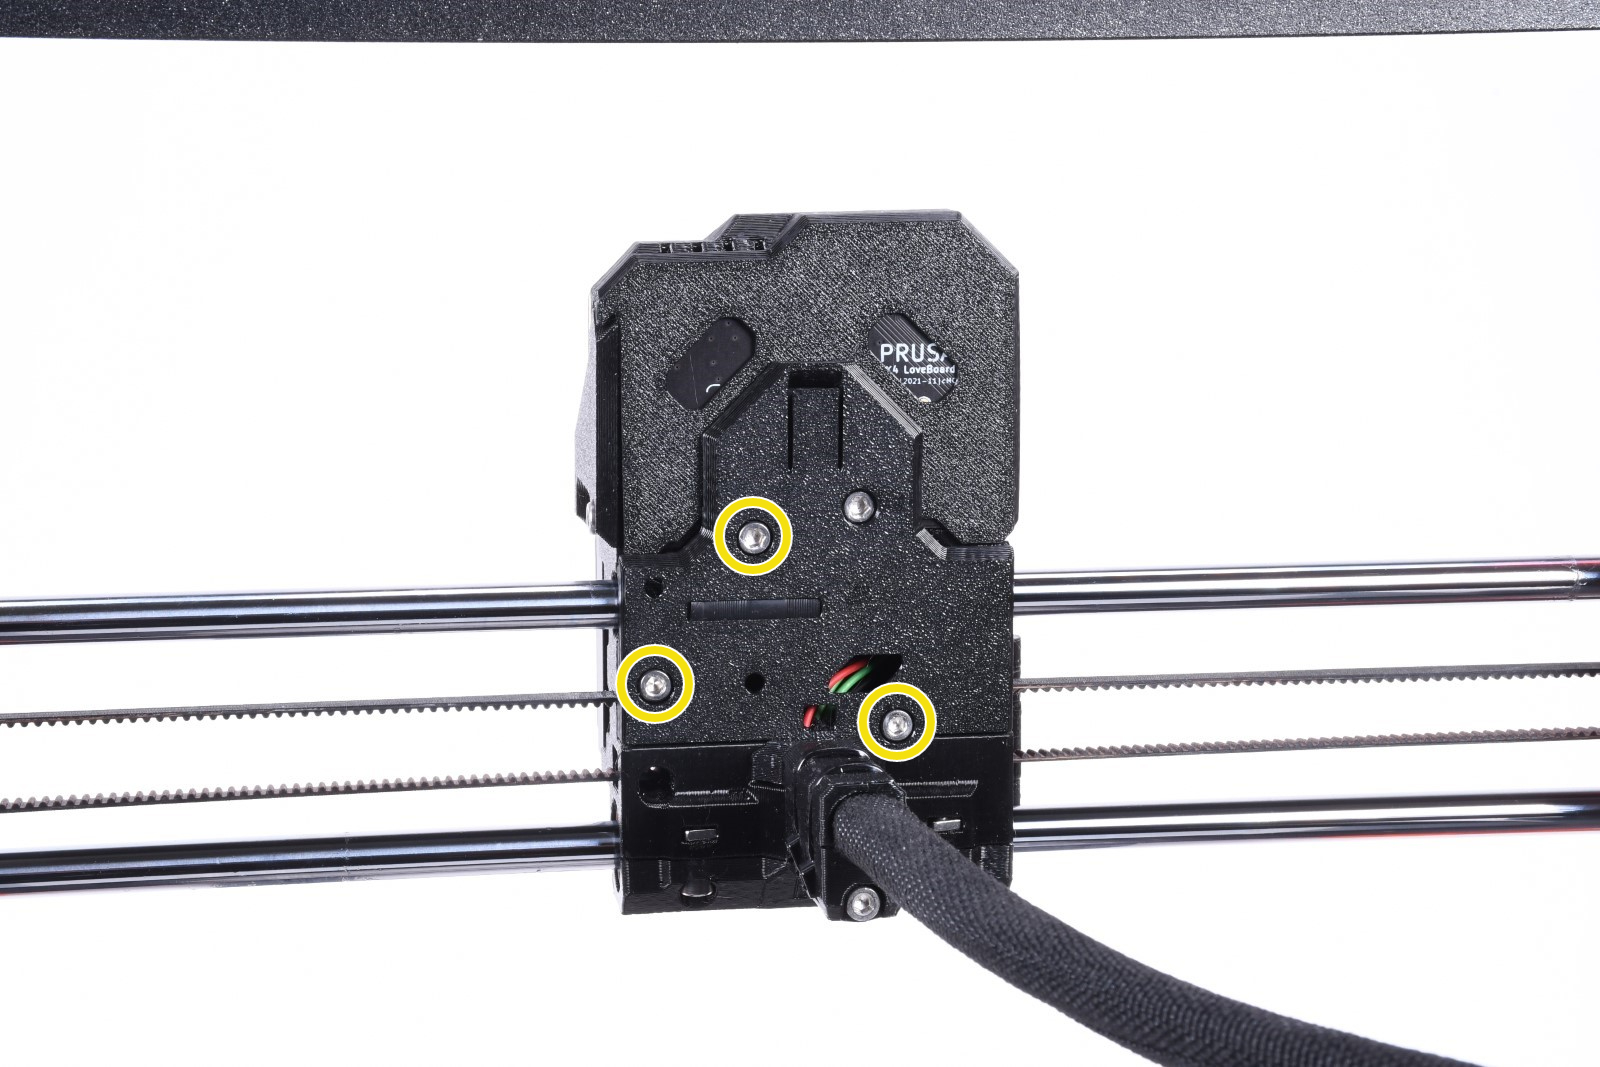
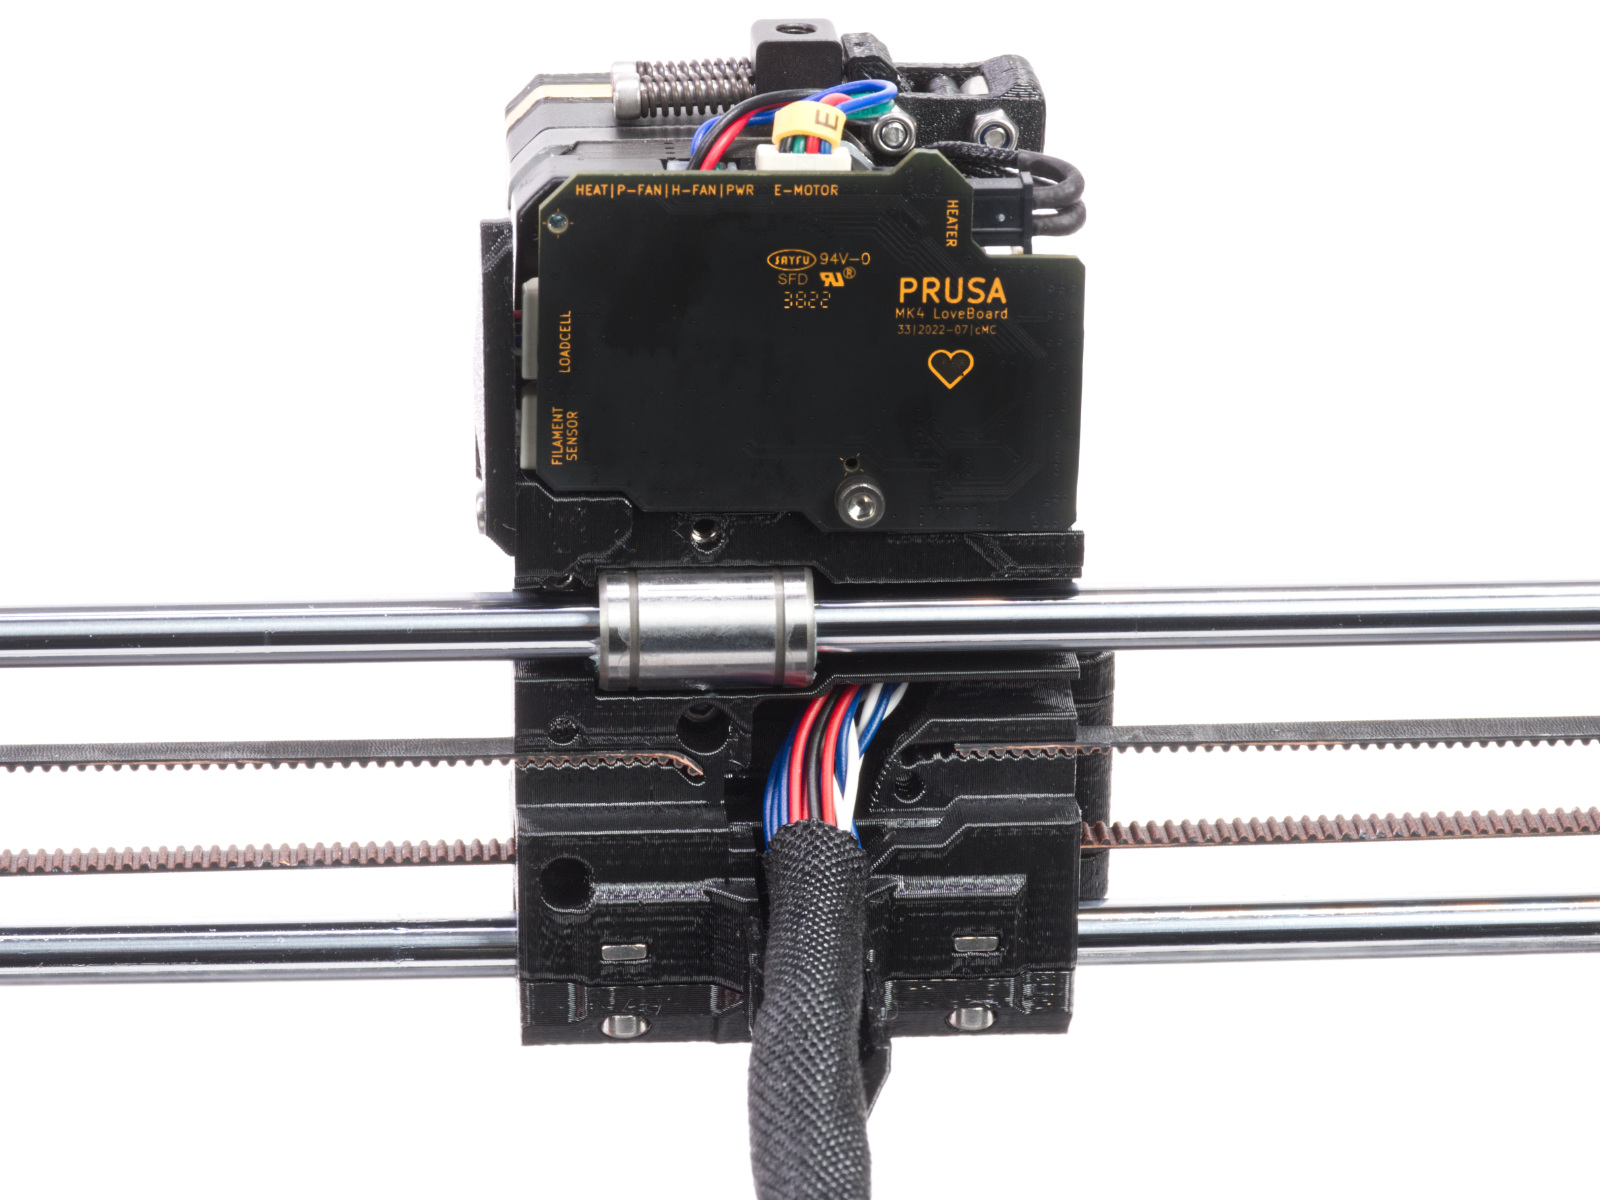
X Axis Belt (From the Prusa Website)
Slight Adjustments
 |
|
Large Adjustments
Y Axis Belt
Slight Adjustment
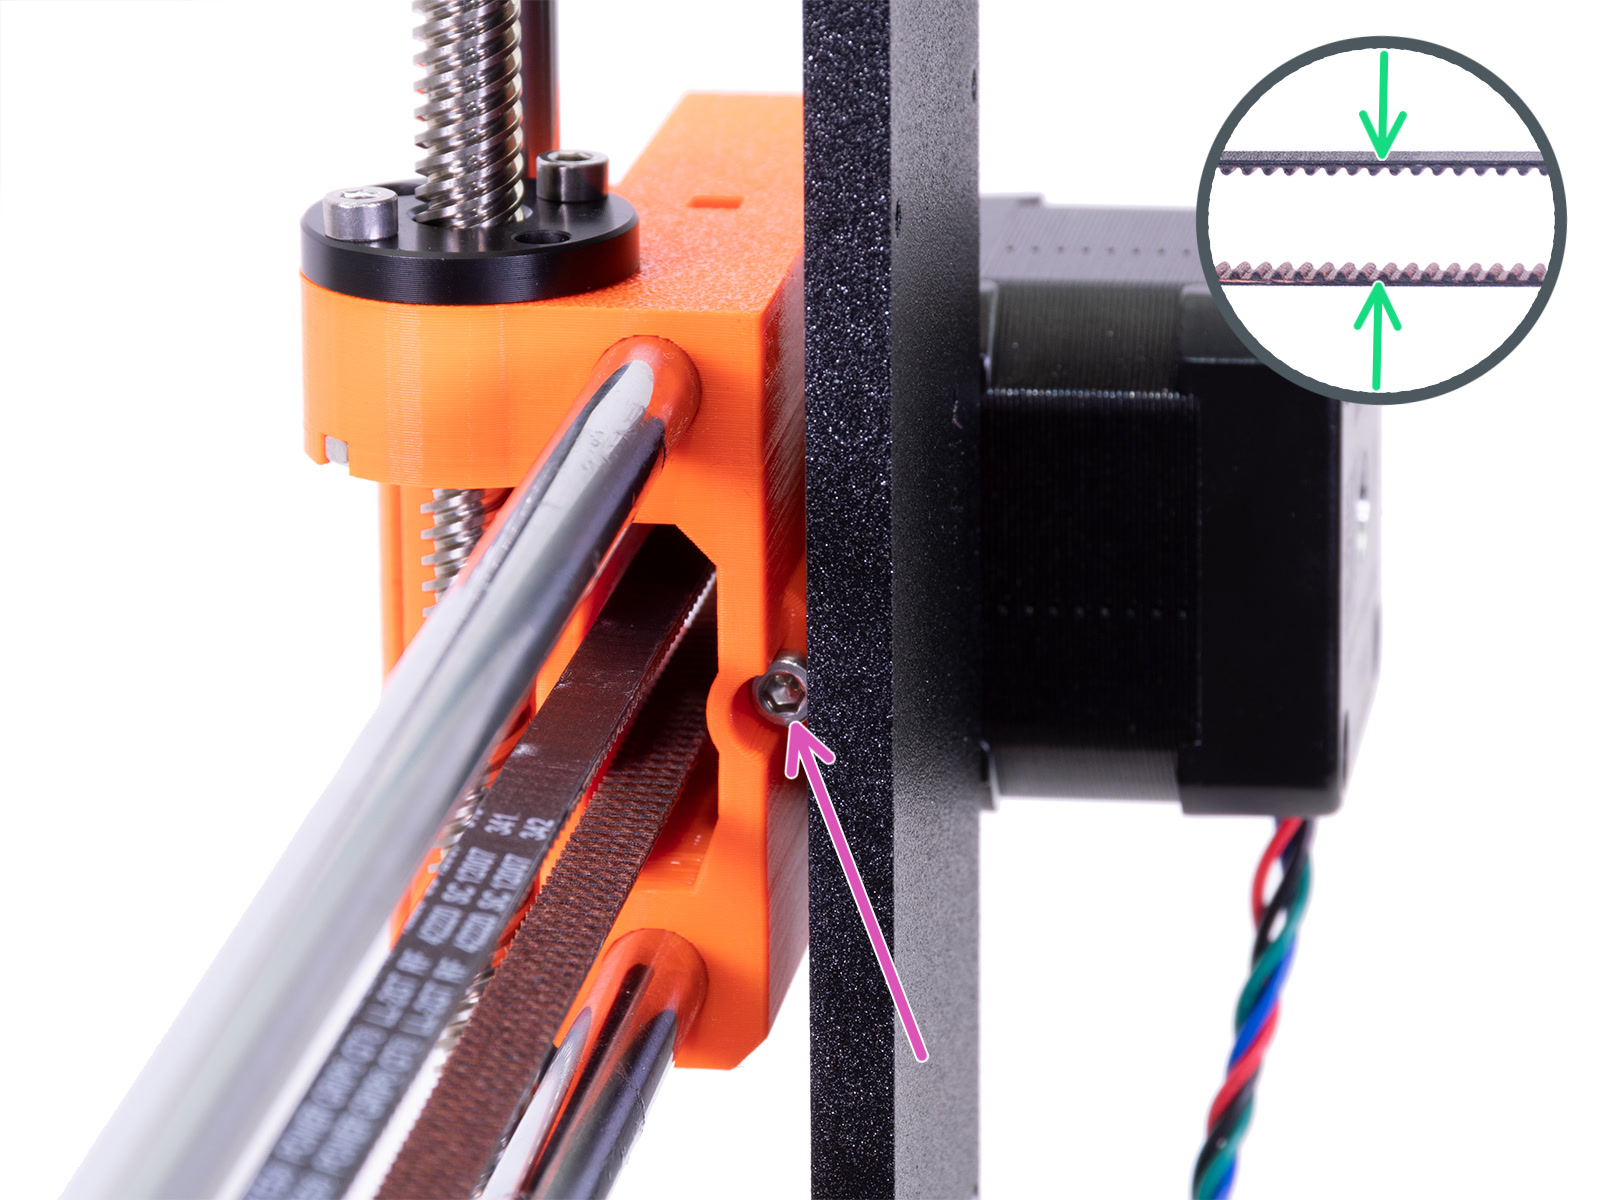
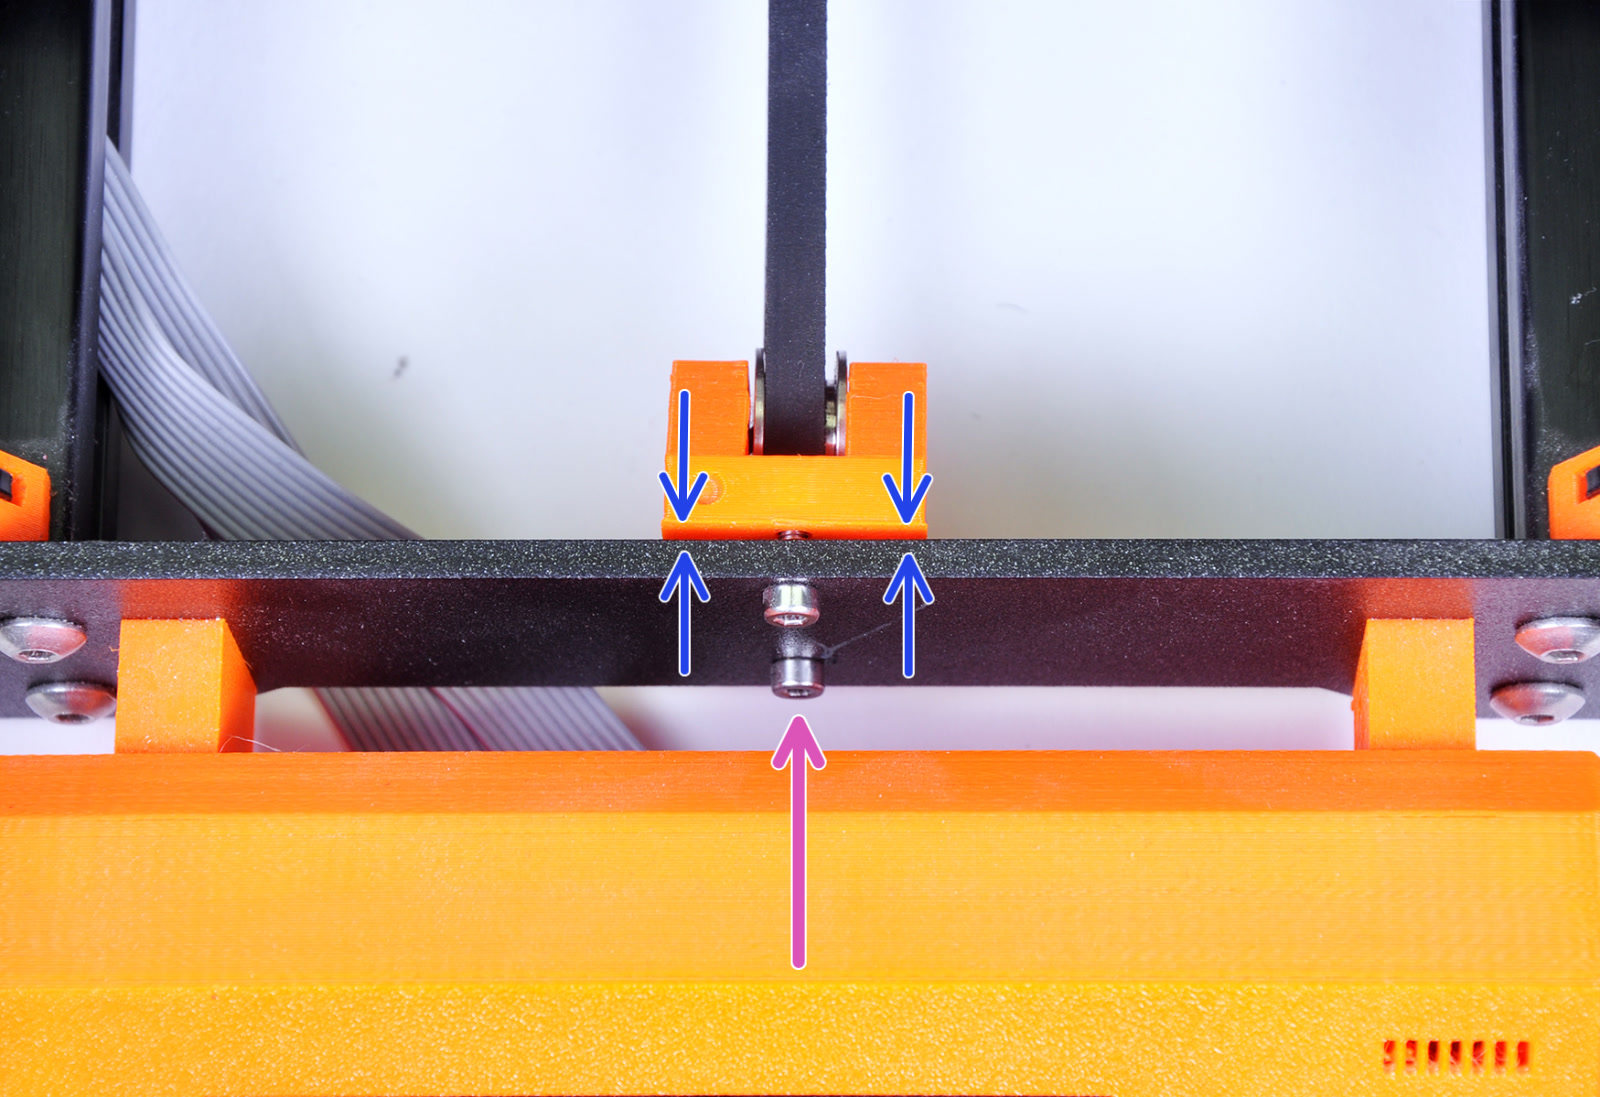
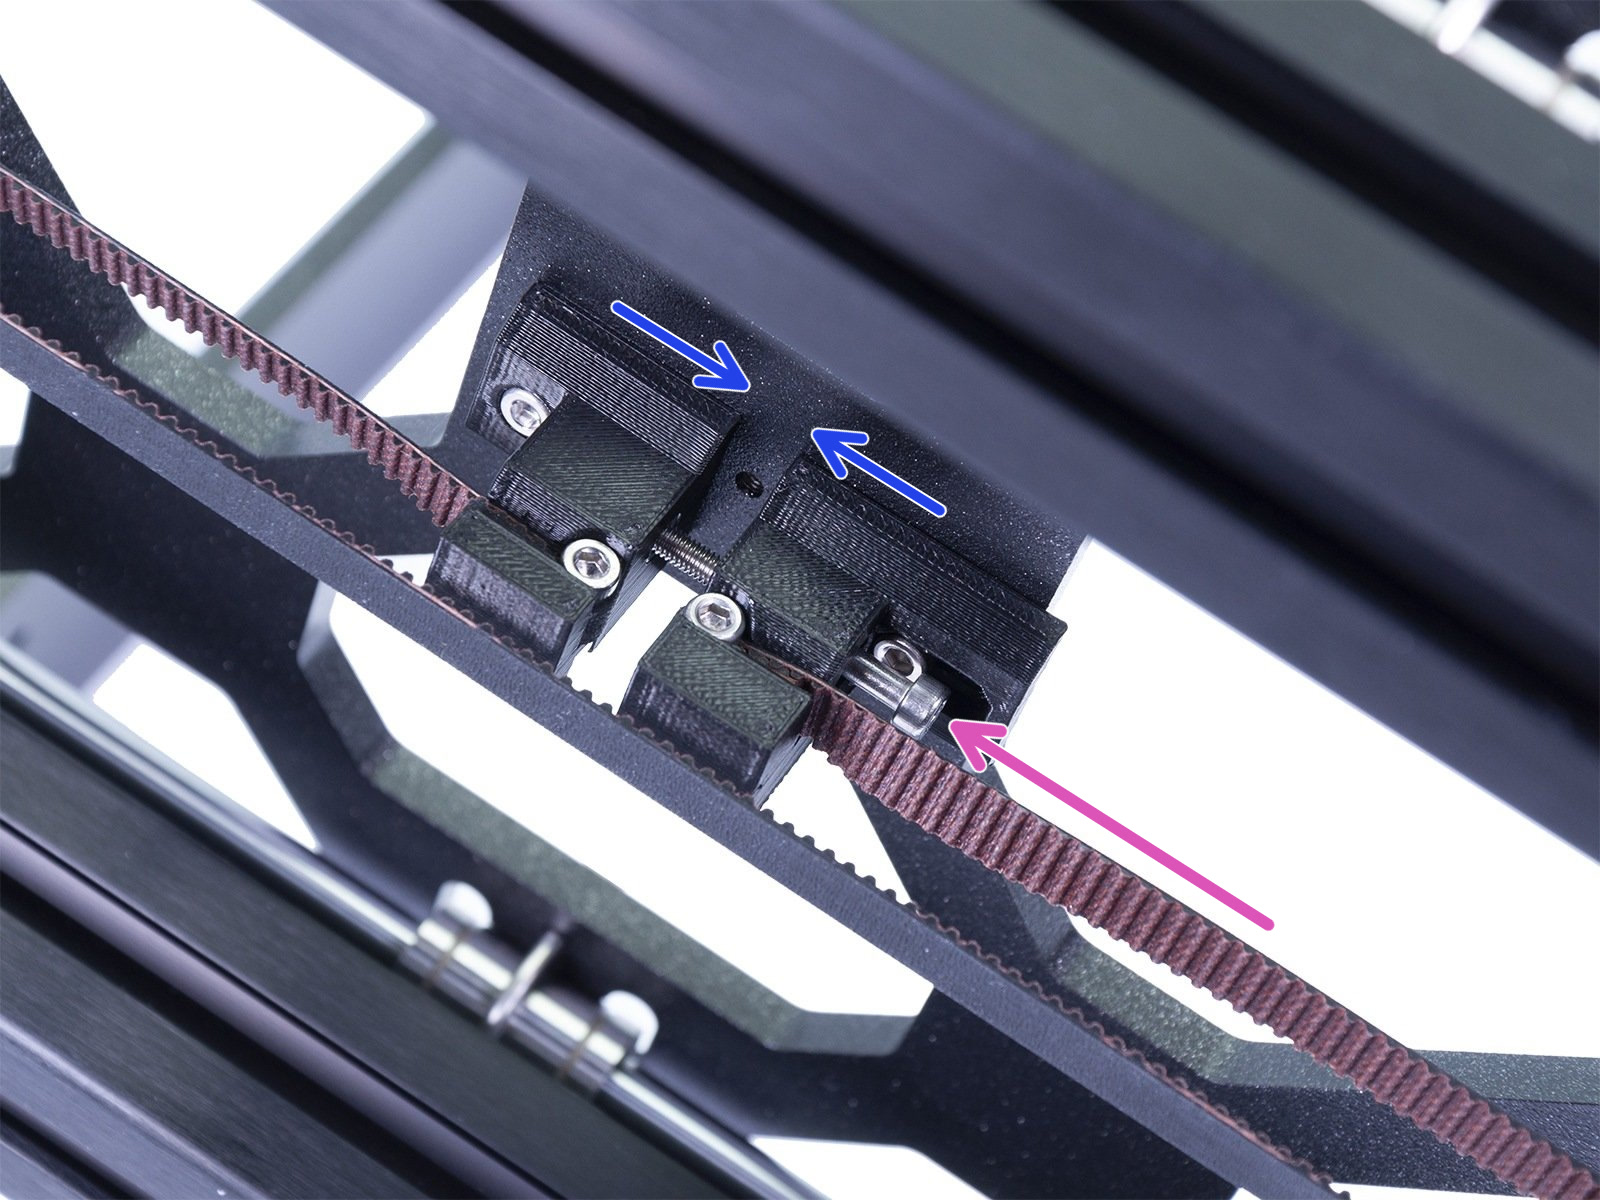
On the front plate of the printer's frame, behind the LCD module, you will find the printed Y-axis belt idler. This is held by two M3X10 screws (purple arrow), going through the front plate.
If you have a gap between the idler part and the front plate of the frame (blue arrows) you can tighten the belt by using your 2.5 mm Allen key to turn the screws clockwise (purple arrow), closing the gap.
The easiest way to access the screws is from below, by moving the printer to the edge of its table, with the LCD module sticking out. You now have access to the bolts from below the LCD module.
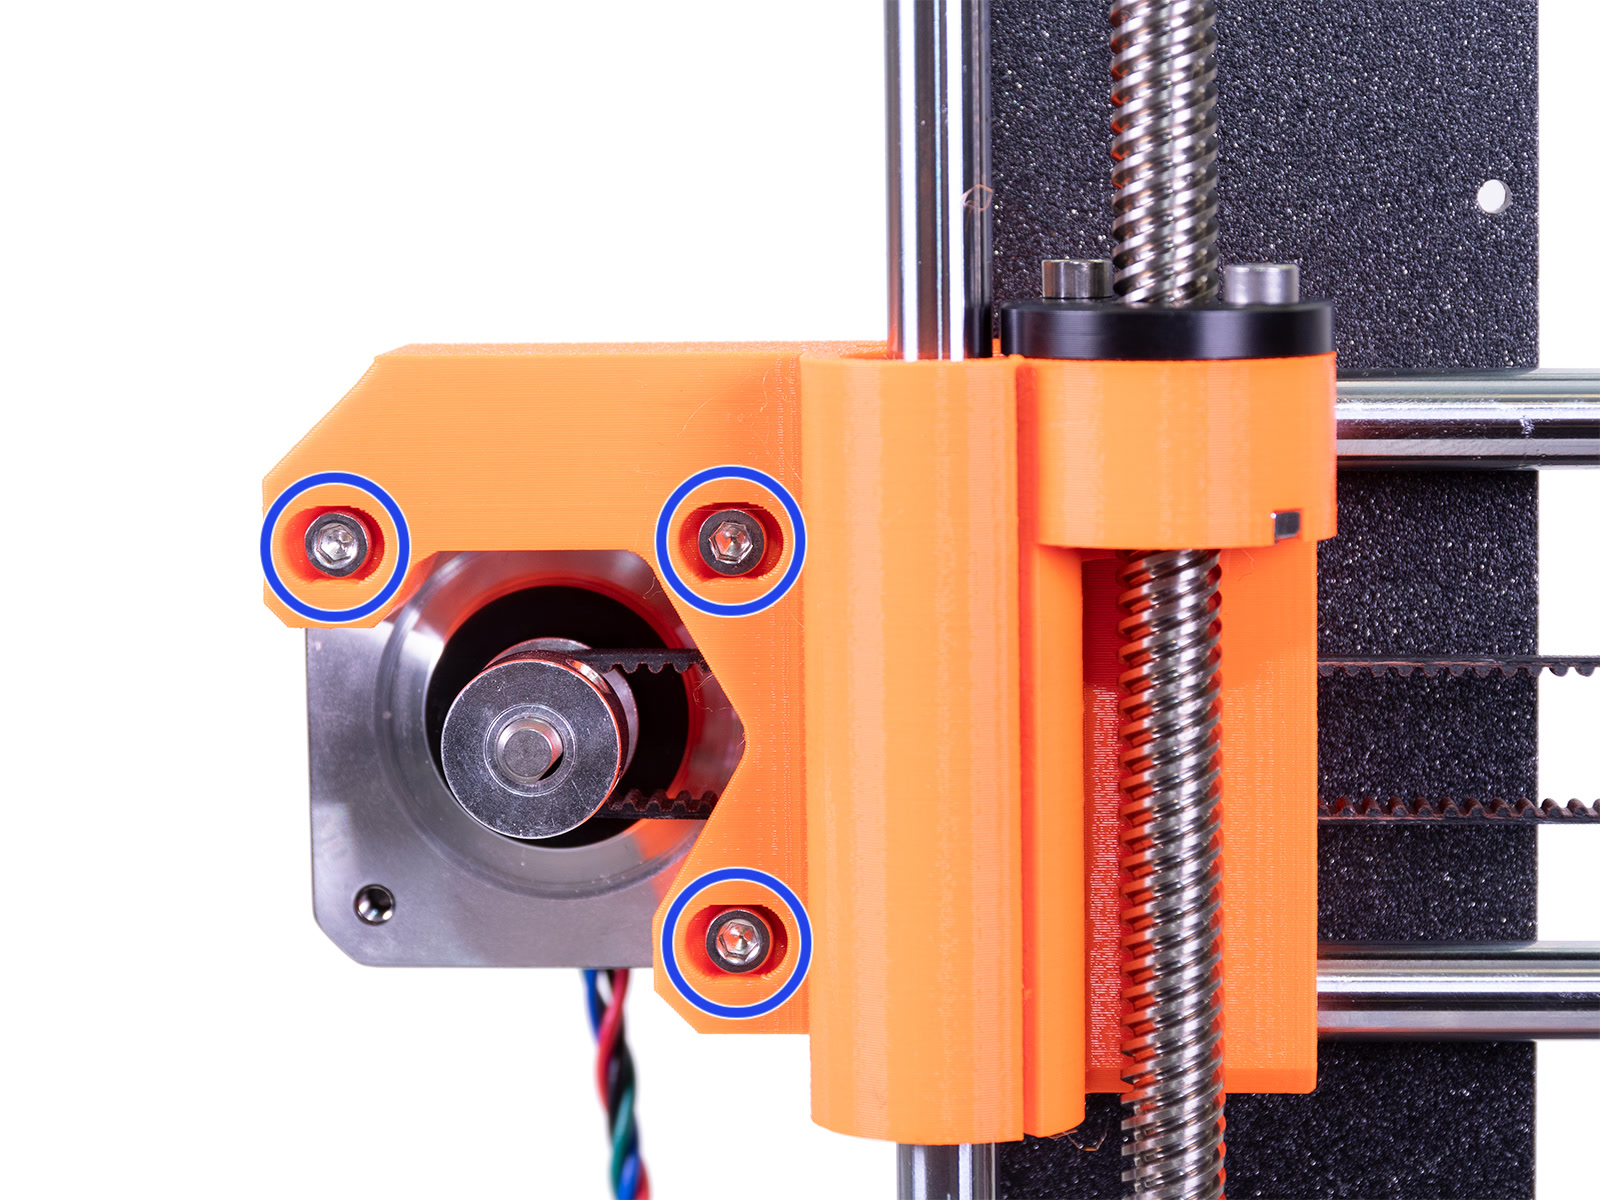
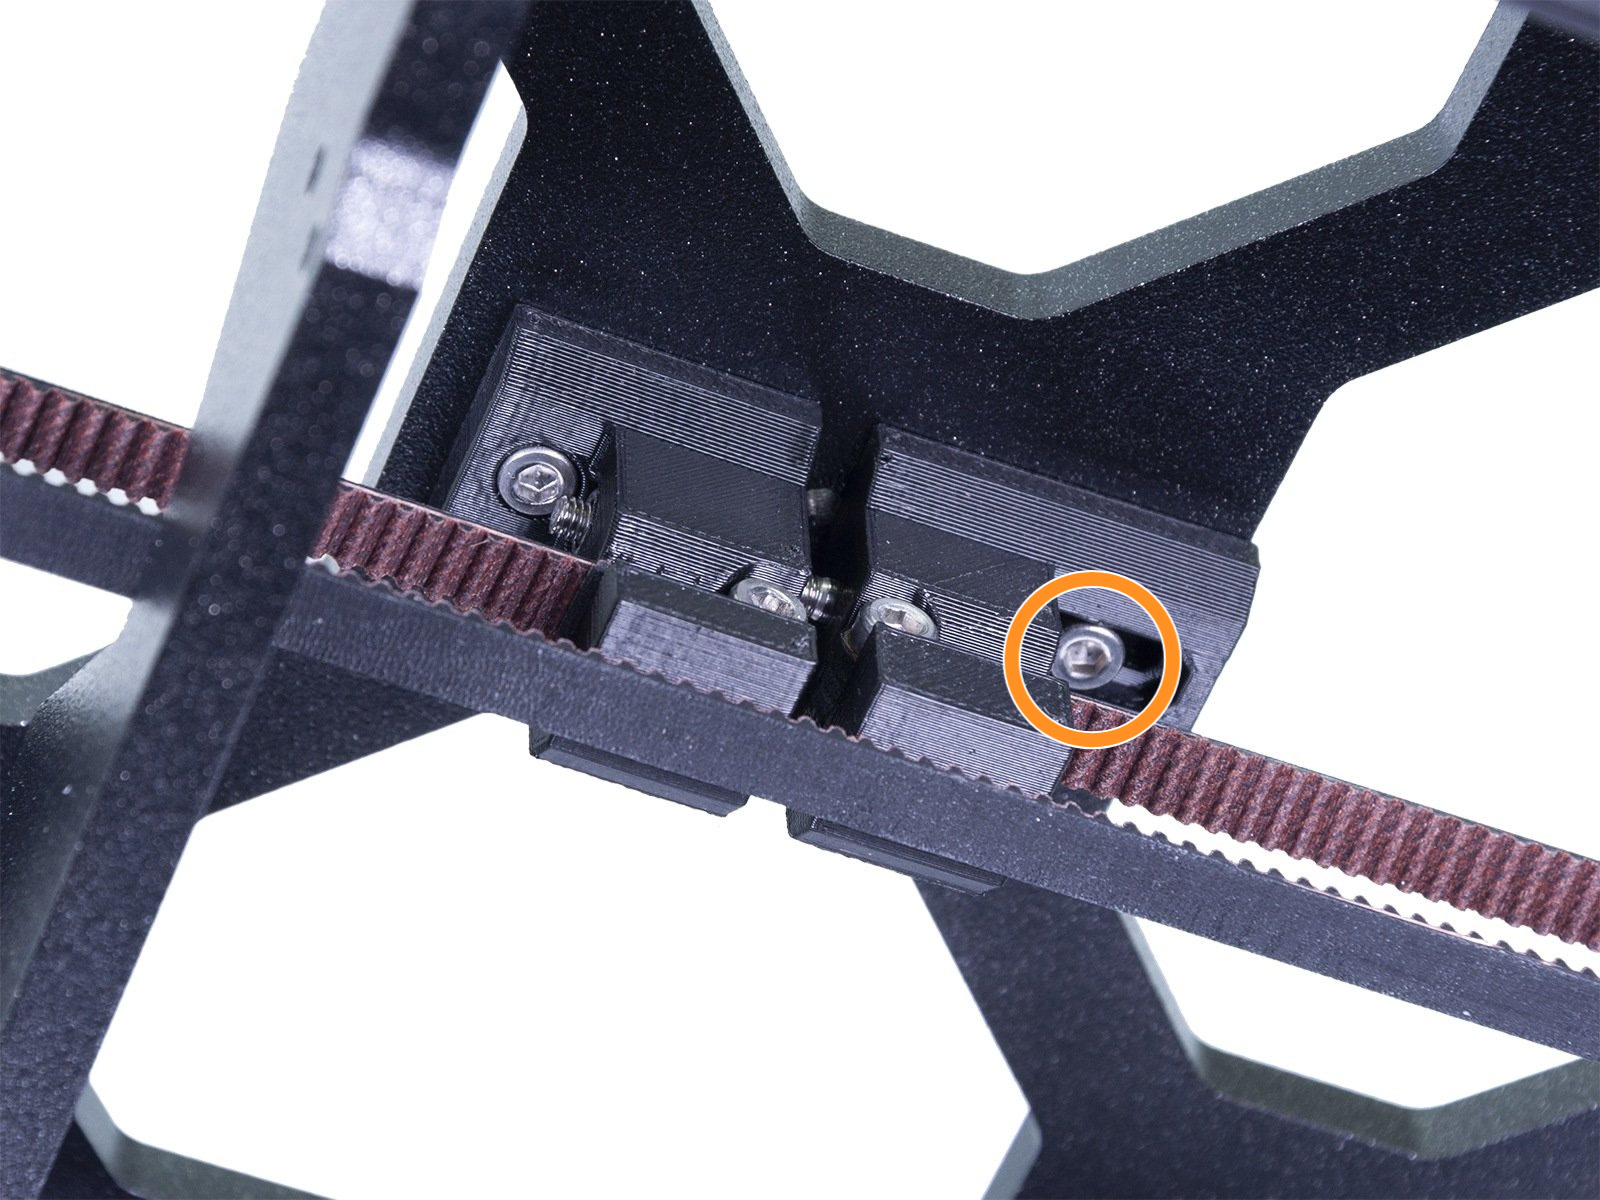
Large adjustments
 |
 |
From the Prusa Website:
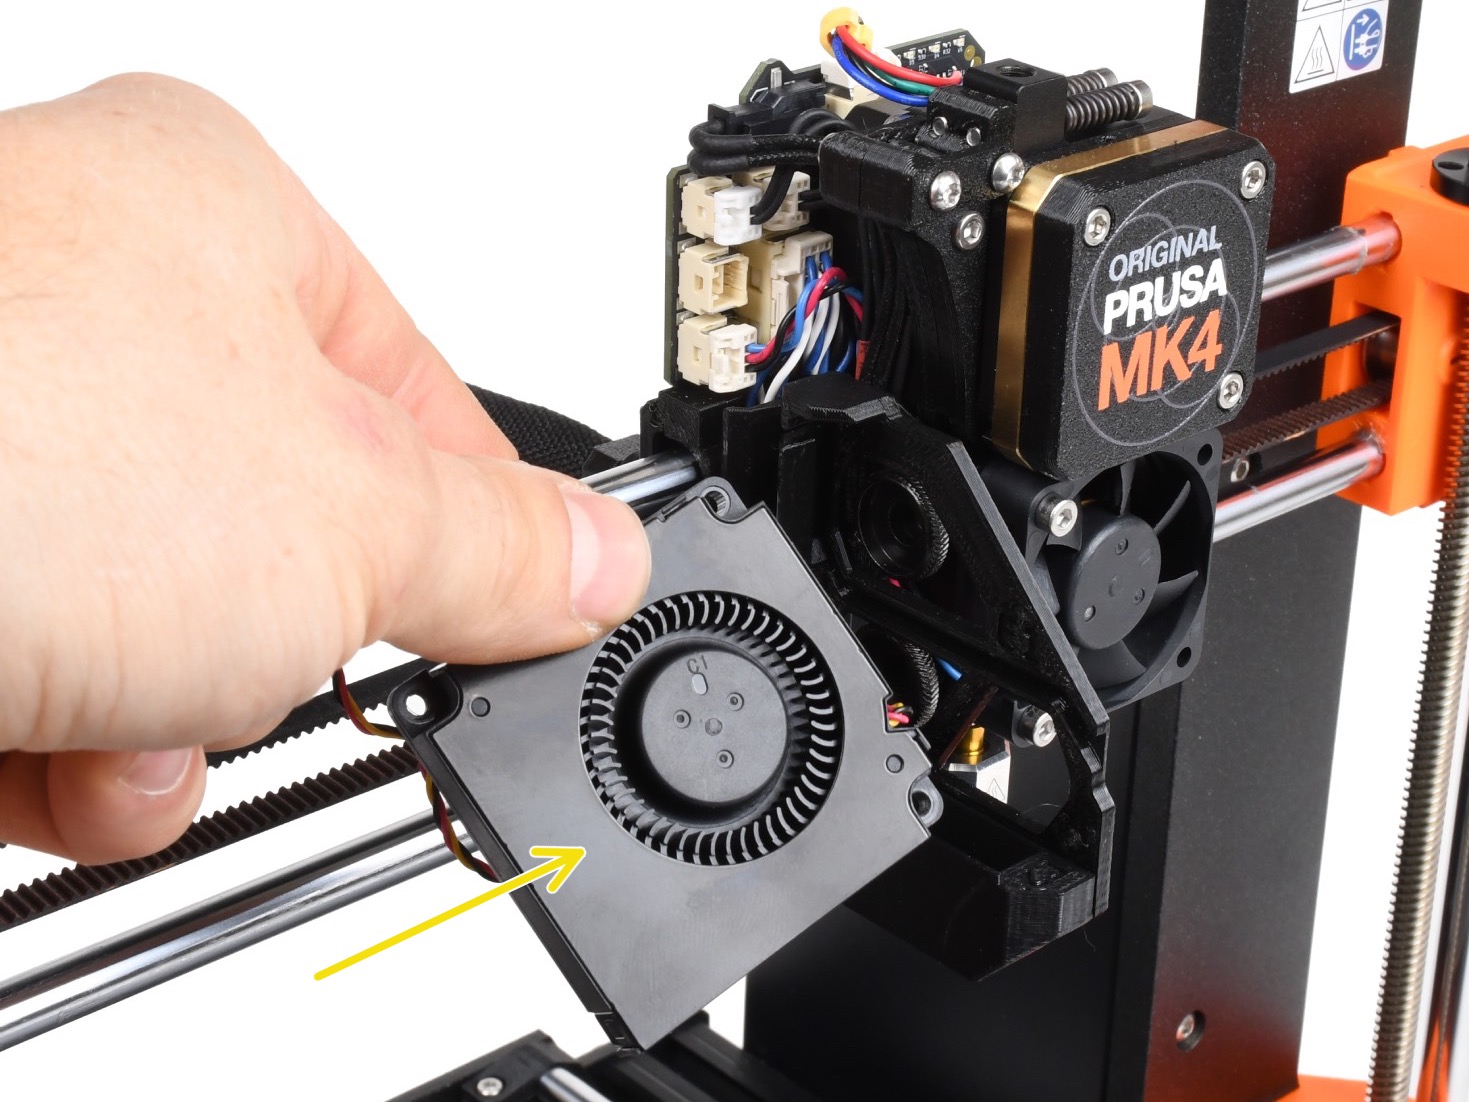
The RPM (revolutions per minute) of both fans is constantly measured. This means that the printer will report an error if the fan suddenly slows down, for example, due to a piece of filament stuck in it.
In such a case, check and remove any dirt from the relevant fan. Do not try to bypass the RPM check, as this could damage the printer!
Both fans should be checked and cleaned after every few hundred hours of printing. Dust can be removed with compressed air in a spray can, small plastic threads can be removed with tweezers.
Do not blow compressed air on the running fan.
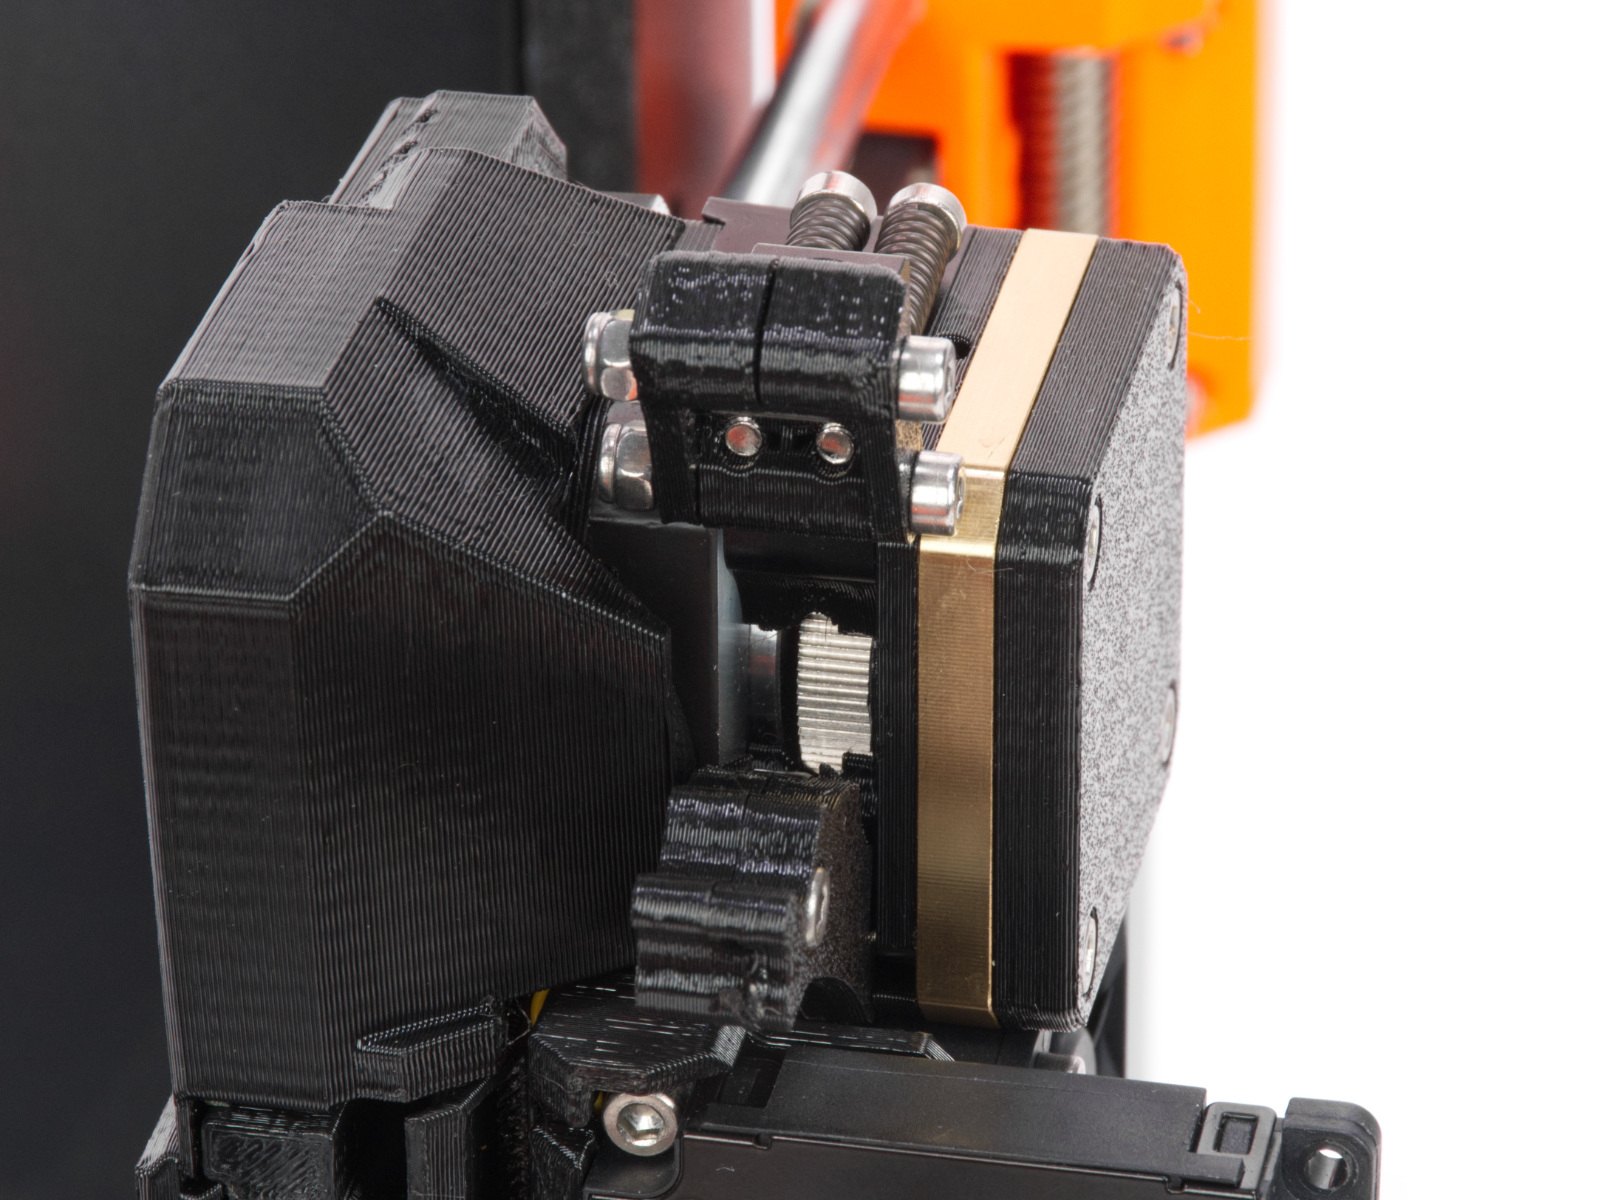
When accessing the extruder parts, avoid opening the gearbox, unless our official technical support asks for it. In case you need to open the gearbox, make sure that you have the Assembly Adapter printed so it can be re-assembled correctly.
The primary gear and the bearings attached to the Idler Shaft in the extruder do not need any lubricant. Over time, a deposit of filament debris can form in the grooves of the primary gear, which then causes insufficient filament extrusion. Access the extruder by lifting the Idler Nut, and then moving the Idler Shaft. You can blow away the dirt with compressed air, or use a brass brush or an ordinary toothpick. Use the access hole on the side of the extruder.